Hi!
Super quick post for the Card Concept #53:

Here’s my Clean and Layered card:

This card is extra special to me because I made it for my friend, Cindy, while she was here visiting me in Germany from Tennessee. She came for 10 days just to visit me! She and I belong to a card challenge which she started years ago. Cindy, Joy, Gerie, Sue and I are spread all over the place. We are in Tennesse, Virginia, Alaska, Pennsylvania and Germany, but we have fun sending each other our challenge cards every month. For our monthly challenge, we make 2 different cards according to a chosen theme. We make an identical pair for each member of the challenge, so 4 of each card. This month’s theme was ‘Spring.’ I can’t seem to make 4 cards that are exactly alike, so I should say that I made 3 more very similar cards to this one! 🙂

My friend, Sue, asked me to explain how I made this card. So here are some instructions. 🙂
I stamped on the card base with:

Then, I stamped the butterfly with this SU set on a small piece of cs: (I used the 3 large images, stamping in Melon Mambo, Melon Mambo again and then black)


Next, I partially die cut the butterfly using this die from SU: (bottom left die)
I did not photograph the partial die cutting, so if you have not tried this before please try doing an internet search for “partial die cutting Butterflies Thinlits dies” or ” partial die cutting” and I think you’ll find some great video tutorials.

Then I turned the partially cut butterfly around sideways and then partially ran it through my embossing machine again. This time I used Spellbinders Nestabilities Mega Dies, Labels 17.

I added the sentiment and some little dots (to disguise a smudge on this card) and the ribbon. The ribbon was very fussy, so I think that this was the only 1 out of the 4 that got ribbon. (Ric Rac from Really Reasonable Ribbon)

That’s about it. 🙂

Thanks for stopping by
Grace & Peace,
Melissa
I’d like to play this along at Creative with Stamps for their very first challenge! 🙂

UPDATED: I am very happy to share that this card was chosen by Mackie for a win at the Card Concept!

Here’s what Mackie had to say: “I love Melissa’s beautiful butterfly on this gorgeous card!”
Thanks so much, Mackie!

Places I’m Playing:

Make it Girlie

The Card Concept #53 {Bright & Fresh}
Little Tangles:



 I decided to leave mine without a sentiment for now. I like that it is one layer. I heat embossed in white on fuchsia cardstock and then colored with a variety of Spectrum Noir markers and a black Sharpie.
 I’m going to share this on Instagram for The Daily Marker’s 30 Coloring challenge.

 I had the pleasure of meeting Anita as she was there too. 🙂



 FOLLOW ME ON BLOGLOVIN’!
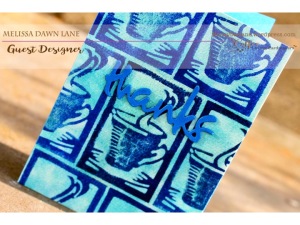



 I applied masking fluid through the ARTplorations stencil Bloom Silhouettes onto watercolor paper,
 I removed the masking fluid and then replaced the stencil and sponged on some dark blue ink.
 Then I used a combination of cutting with a paper trimmer and some fussy cutting to trim down the panel.


 Rainbow, ink-blending, heat embossing, hearts and a big bold……what’s not to LOVE?!


