Today, I have several different embossing paste projects to share with you. This week’s Make It Monday #201 challenge is Cover Plate Stencils and Embossing Paste. I’m also going to play this card over at SSS’s Wednesday Challenge: Add a Little Texture
and
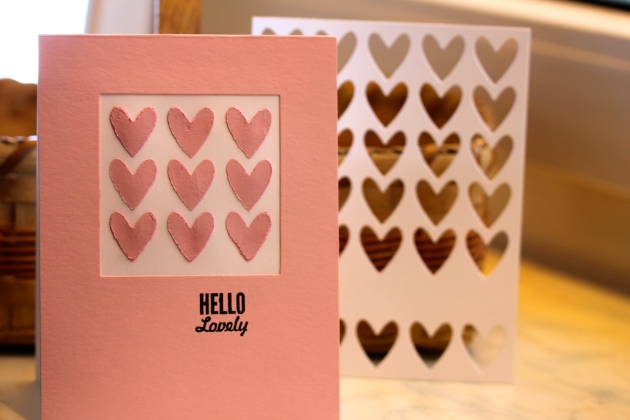
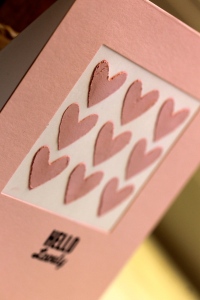
I did not have embossing paste, so I made some of my own. (See the recipe below.) I’m pretty happy with the result. PTI’s heart cover plate die is seeing a lot of use around here recently! This time I used it as a stencil. I’m going to be playing some cards over at Craft Stamper Magazine’s Take It Make It February Challenge : Stenciling.
So, to continue with the embossing paste saga……
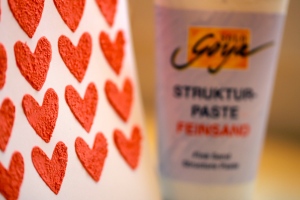
I’ve been looking around locally for embossing paste, but the best I could come up with was texture/structure paste with some fine sand in it. Here is my experiment with that.
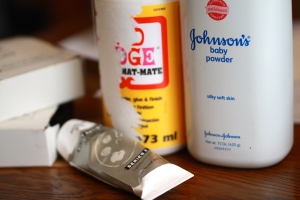
Here’s the recipe that I tried:
Homemade Embossing Paste Recipe
1/2 Cup Talc/Baby Powder
1 TBSP White Liquid Glue
1 TBSP Acrylic Paint (I used Blick Artist’s Iridescent White)
Water, to adjust consistency
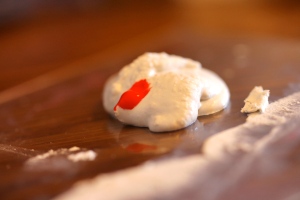
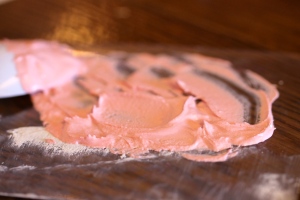
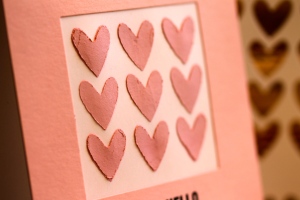
I haven’t ever used embossing paste before, so I had to guess about the proper consistency. I watched Laura Bassen’s MIM #176 video on coloring embossing paste to see if the paste that I made is close to the store bought kind Laura used. I think it was pretty close in consistency, but I’m not sure about the way mine dries. It seems to be pretty brittle. Is that what regular embossing paste is like? Please let me know! I’m wondering if this will hold up to the stress of being mailed. I made the 9-heart card above for MIM’s Challenge #201.
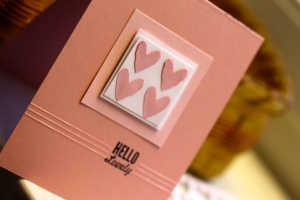
Here is a slightly different variation of the card above.
The design for this next card was inspired by Marion Vagg’s beauty over at Muse and the color scheme was inspired by CASology’s Monochromatic challenge.
Thanks for stopping by!
xo
Melissa
Places I’m playing:
P.S. I also played around with another homemade stencil using PTI’s Peony Cover Plate die. This was very fussy. I tried this twice. This one was my first attempt; the second attempt was a total mess. I’ll have to try this again another time.
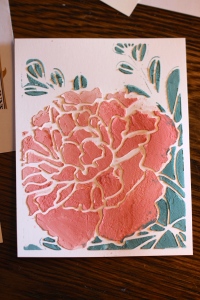
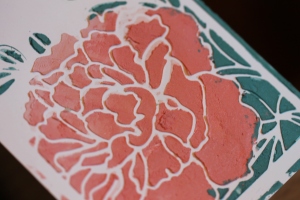 This turned out alright, but I wasn’t totally happy with the result. I’m going to try this one again.

 After it dried, I covered the embossing paste with another die cut and sponged some blue onto the card stock. I also used a pink marker to add color to the edges of the petals. I like the blue, but would use a lighter pink or leave the edges white next time.






Pingback: The Mixed Media Card Challenge #26 – August – Rainbow | honeybeelane
Pingback: AAA Cards Game #60 – Easter | honeybeelane
Oh wow!! awesome creations really!!! I think the one using the large PTI floral cover plate is stunning!
Thank you again for your help.
Patti
LikeLiked by 1 person
Pingback: The Mixed Media Card Challenge #21 – March – Trees – Reminder | honeybeelane
Pingback: The Mixed Media Card Challenge #19 Reminder – January – Beginnings | honeybeelane
Thanks, Debby.
LikeLike
Gorgeous, beautiful heart card.
Thank you for joining us at Simon says Stamp Wednesday Challenge.
Luv
Debby
LikeLiked by 1 person
Thank you, Linda.
LikeLike
Another beautiful design …… Thank you for joining in with the Craft Stamper TIMI challenge …… good luck! Linda xx
LikeLiked by 1 person
Hey Melissa!! I love those heat embossed flowers. They look yummy!! Thank you for playing along with us this month at CS Take It Make It Challenge.
LikeLiked by 1 person
Thanks, Kymona! This is linked up at CASolgy, but I checked out CS’s challenge. Thanks for the heads up though! I think that I’ve got a few that I can play for their stenciling challenge. 🙂
LikeLike
Hey Melissa!! I’m so sorry about that!! This is what happens when I try to multitask!! Thank you for correcting me. Both challenges are great and so different. I hope you get to play with CS’s too!!
LikeLiked by 1 person
Thank you for sharing how to make your own embossing paste. And your card turned out beautifully! Love it, Melissa! Thank you so much for sharing your creativity with us at CASology. Hugs, May
LikeLiked by 1 person
Thank you, May. 🙂
LikeLike
glad to see I’m not the only one making my own embossing /texture paste…Can’t stand to pay for something I already have in the house and not using anymore…..baby powder:) Doesn’t it smell good???!
Keep working with that cover-plate, a masterpiece may be just around the corner!!
LikeLiked by 1 person
Thanks, Laura Jane! Maybe I’ll try again tomorrow. 🙂
LikeLike
Your pink heart cards are so pretty!!
LikeLiked by 1 person
Thank you, Shimekko. 🙂
LikeLike
Pingback: Shaker Donut | honeybeelane
Thank you very much, Connie. Let me know how making your own works for you. I’m still pinching myself about the years of stamps prize! 🙂
LikeLike
Absolutely beautiful Melissa! Your home made embossing paste looks fabulous. I have not been able to find embossing paste locally so have been using modeling paste which looks very similar. Have thought about making my own, will definitely try it now. Great job! Congrats on winning the year of stamps!!!!
LikeLiked by 1 person
I love that you made your own embossing paste!! Way cool!! Your cards are absolutely fabulous!!
LikeLiked by 1 person
Thanks, Kristi! 🙂
LikeLike
Thank you for the kind feedback, Kristi. I visited your blog and love your cards. I signed up to follow you by email so I won’t miss your posts. 🙂
LikeLike
Wow!! How awesome that you made your own paste!! Your cards turned out fabulous!!
LikeLiked by 1 person
Wonderful pink project! I love that you made your own embossing paste. I’ll have to try that when my store bought pot runs out. Thanks so much for playing along at CASology this week.
LikeLiked by 1 person
Thanks, Joyce! It was surprisingly easy to make the paste. Let me know how it turns out. 🙂
LikeLike
Pingback: More Homemade Embossing Paste | honeybeelane